Making your own paper is easier than you think and surprisingly rewarding.
With just a blender, simple frames, and scrap paper you’d normally toss out, you can create beautiful, custom sheets in under an hour. Add flower petals, seeds, or colors to make truly unique paper perfect for cards, gifts, or art projects.
This blog covers everything you need: materials, step-by-step instructions, creative variations, and tips to avoid common mistakes.
Ready to convert trash into treasure? Let’s get started.
Why Make DIY Paper at Home?
Making your own paper is easier than you think and offers real benefits beyond just crafting.
- It’s Free and Eco-Friendly: Turn junk mail, old newspapers, and scrap paper into something useful instead of tossing them out.
- Make It Your Way: Control the color, thickness, and texture. Add flower petals, seeds, or glitter to create paper that’s completely unique. Store-bought options can’t compete with truly custom designs.
- It’s Actually Relaxing: The process is surprisingly therapeutic. Blending pulp and forming sheets offers a satisfying, screen-free activity that many find meditative.
- Perfect for Special Projects: Homemade paper adds a personal touch to cards, journals, and gifts that shows real effort and creativity.
Materials Needed to Make DIY Paper
Getting started with DIY papermaking requires just a few basic items, most of which you probably already have at home.
| Item | Purpose | Options |
|---|---|---|
| Paper scraps | Base material for pulp | Newspapers, junk mail, printer paper, cardboard (avoid glossy magazines) |
| Blender | Breaks down paper into pulp | Any basic kitchen blender; consider using an old one |
| Mold and deckle | Shapes the paper sheets | Two frames with screening; buy ready-made or DIY with picture frames and window screen |
| Basin or tub | Holds pulp mixture | Plastic storage bin, large dishpan, or similar container |
| Sponges | Absorbs excess water | Any household sponges |
| Towels | Dries sheets and absorbs moisture | Old towels work best |
| Felt or fabric | Separates paper layers while drying | Cut-up old t-shirts, felt squares, or similar fabric |
| Flat board | Pressing and drying the surface | Wooden board, cutting board, or flat plastic surface |
With these simple materials gathered, you have everything needed to create your first batch of homemade paper.
How to Make DIY Paper: Step-by-Step Tutorial
Making your own paper at home is simpler than you think. Follow these straightforward steps to create your first batch of handmade paper.
Step 1: Prepare Your Paper Scraps
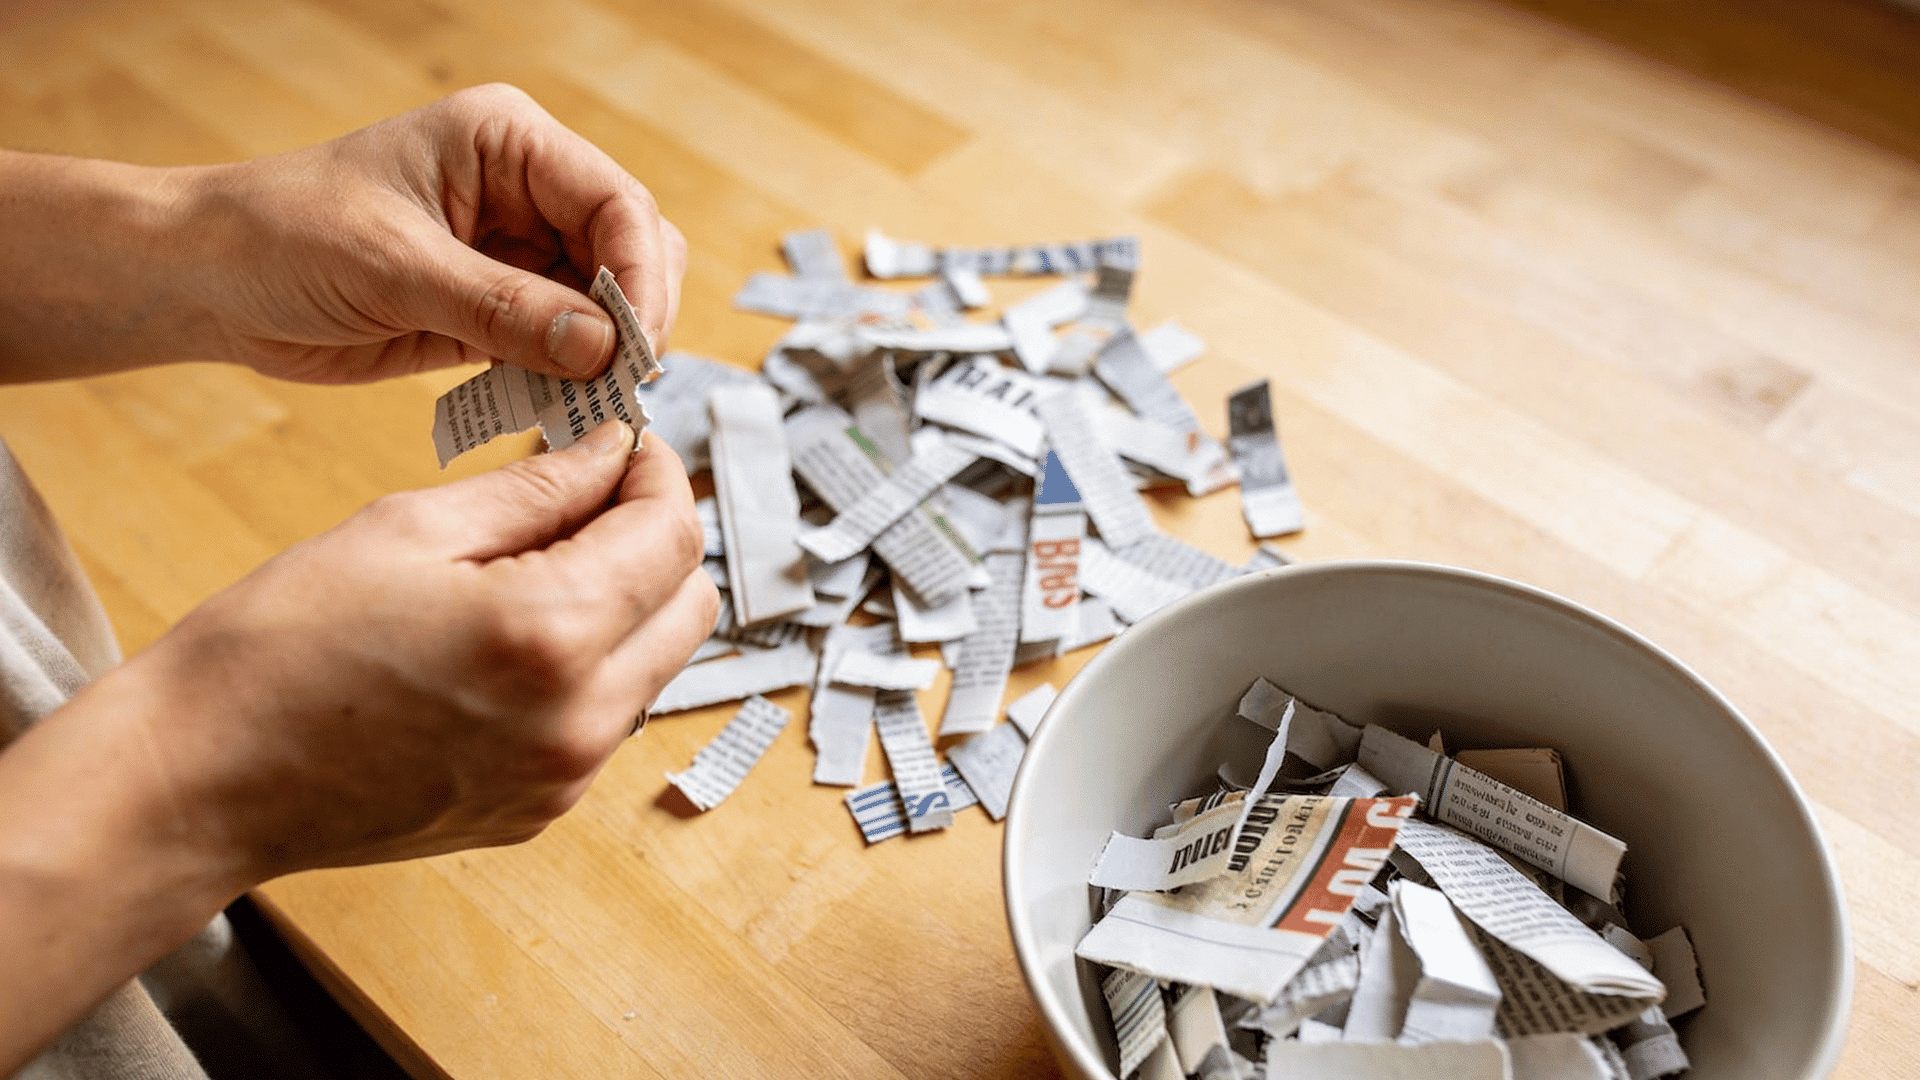
Tear old newspapers, junk mail, or scrap paper into small pieces, about 1-2 inches each. You’ll need roughly 2 cups of torn paper.
Smaller pieces blend faster and create smoother pulp.
Step 2: Blend the Pulp
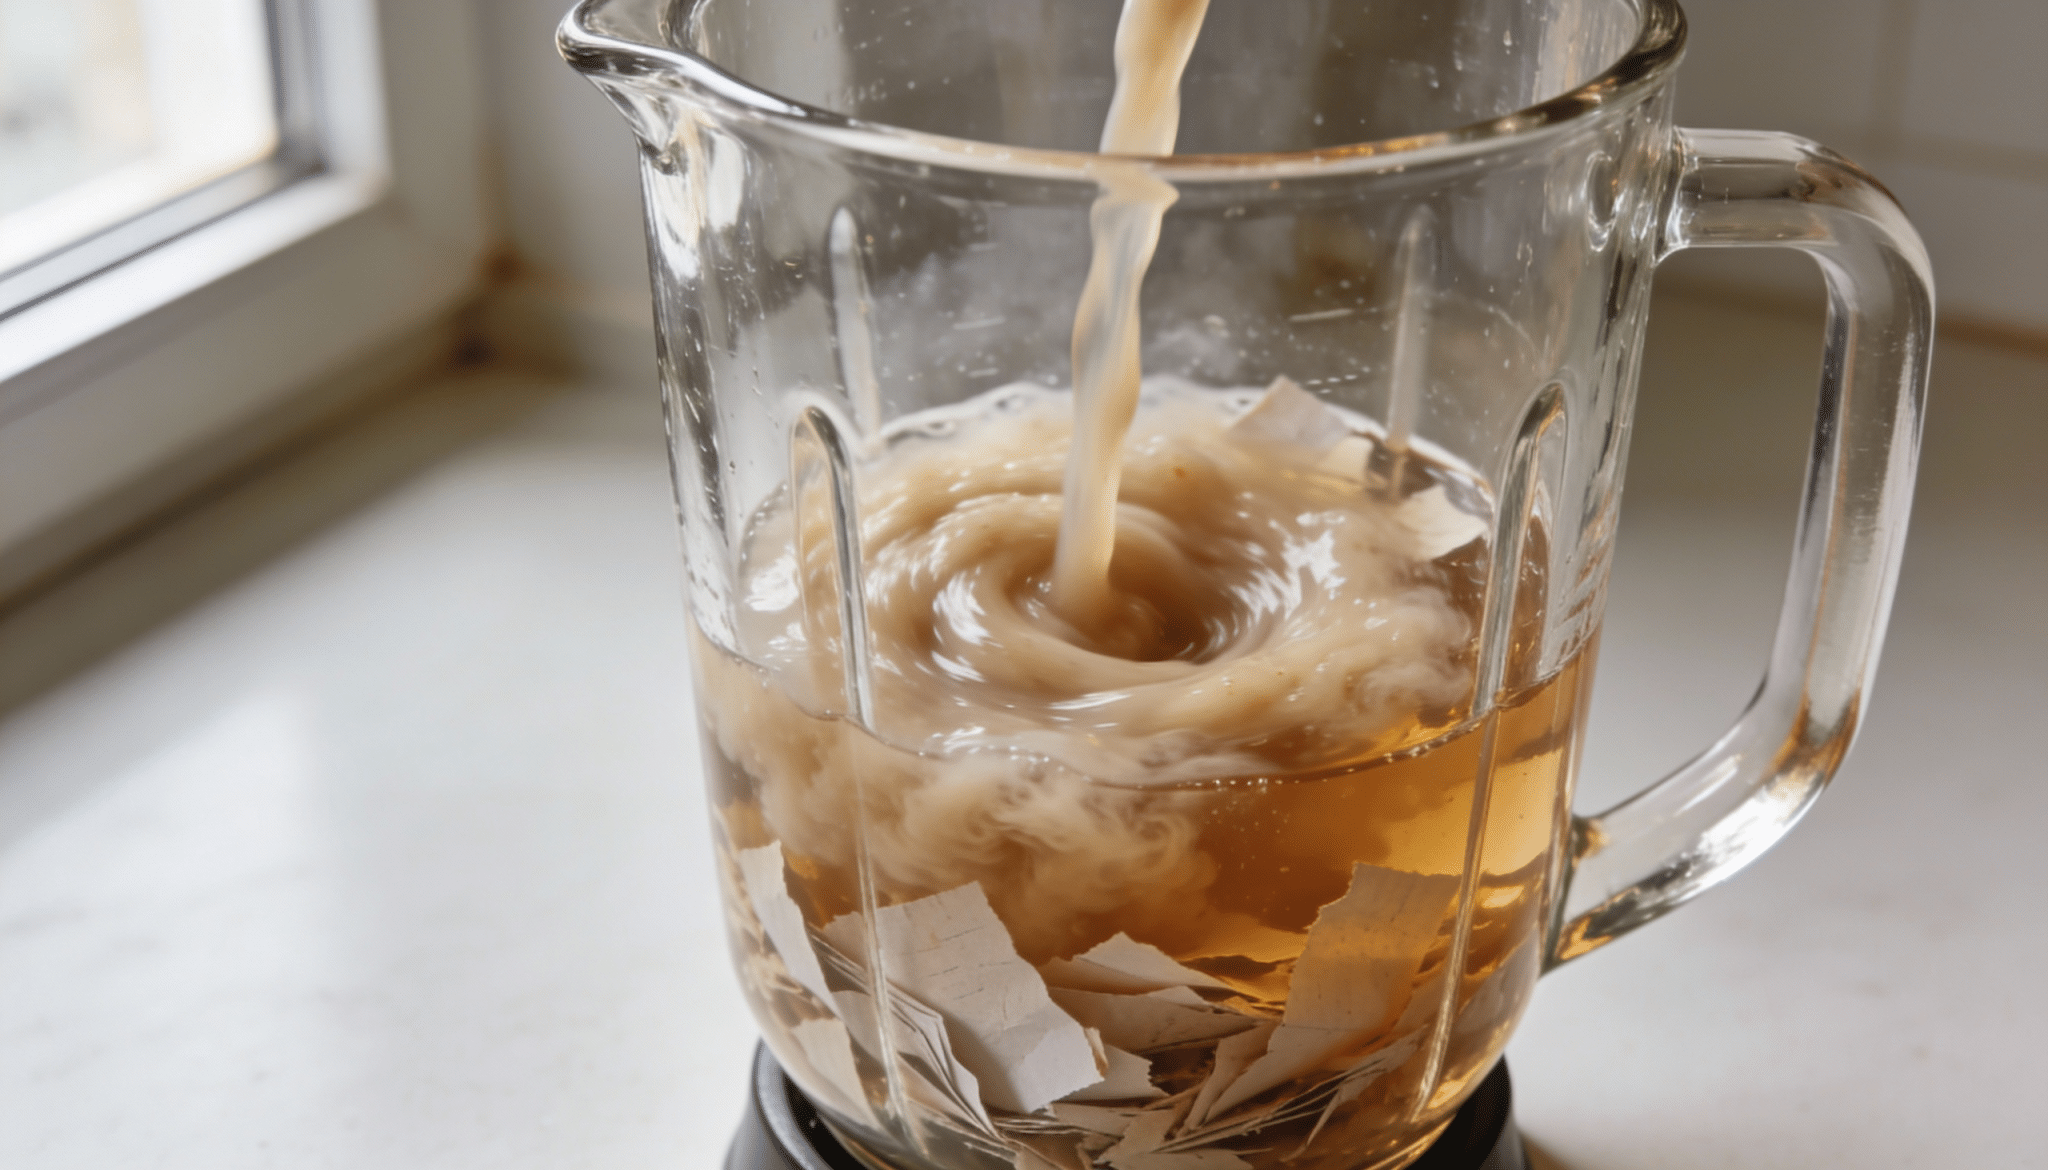
Fill your blender halfway with warm water.
Add a handful of paper scraps and blend for 30-60 seconds until you get a smooth, oatmeal-like consistency.
The pulp should have no visible paper chunks.
Step 3: Prepare the Vat

Fill your basin or tub about halfway with water. Add 3-4 blender loads of pulp and stir well.
The mixture should look like a thick soup. Add more pulp for thicker paper and more water for thinner sheets.
Step 4: Form Your Sheet
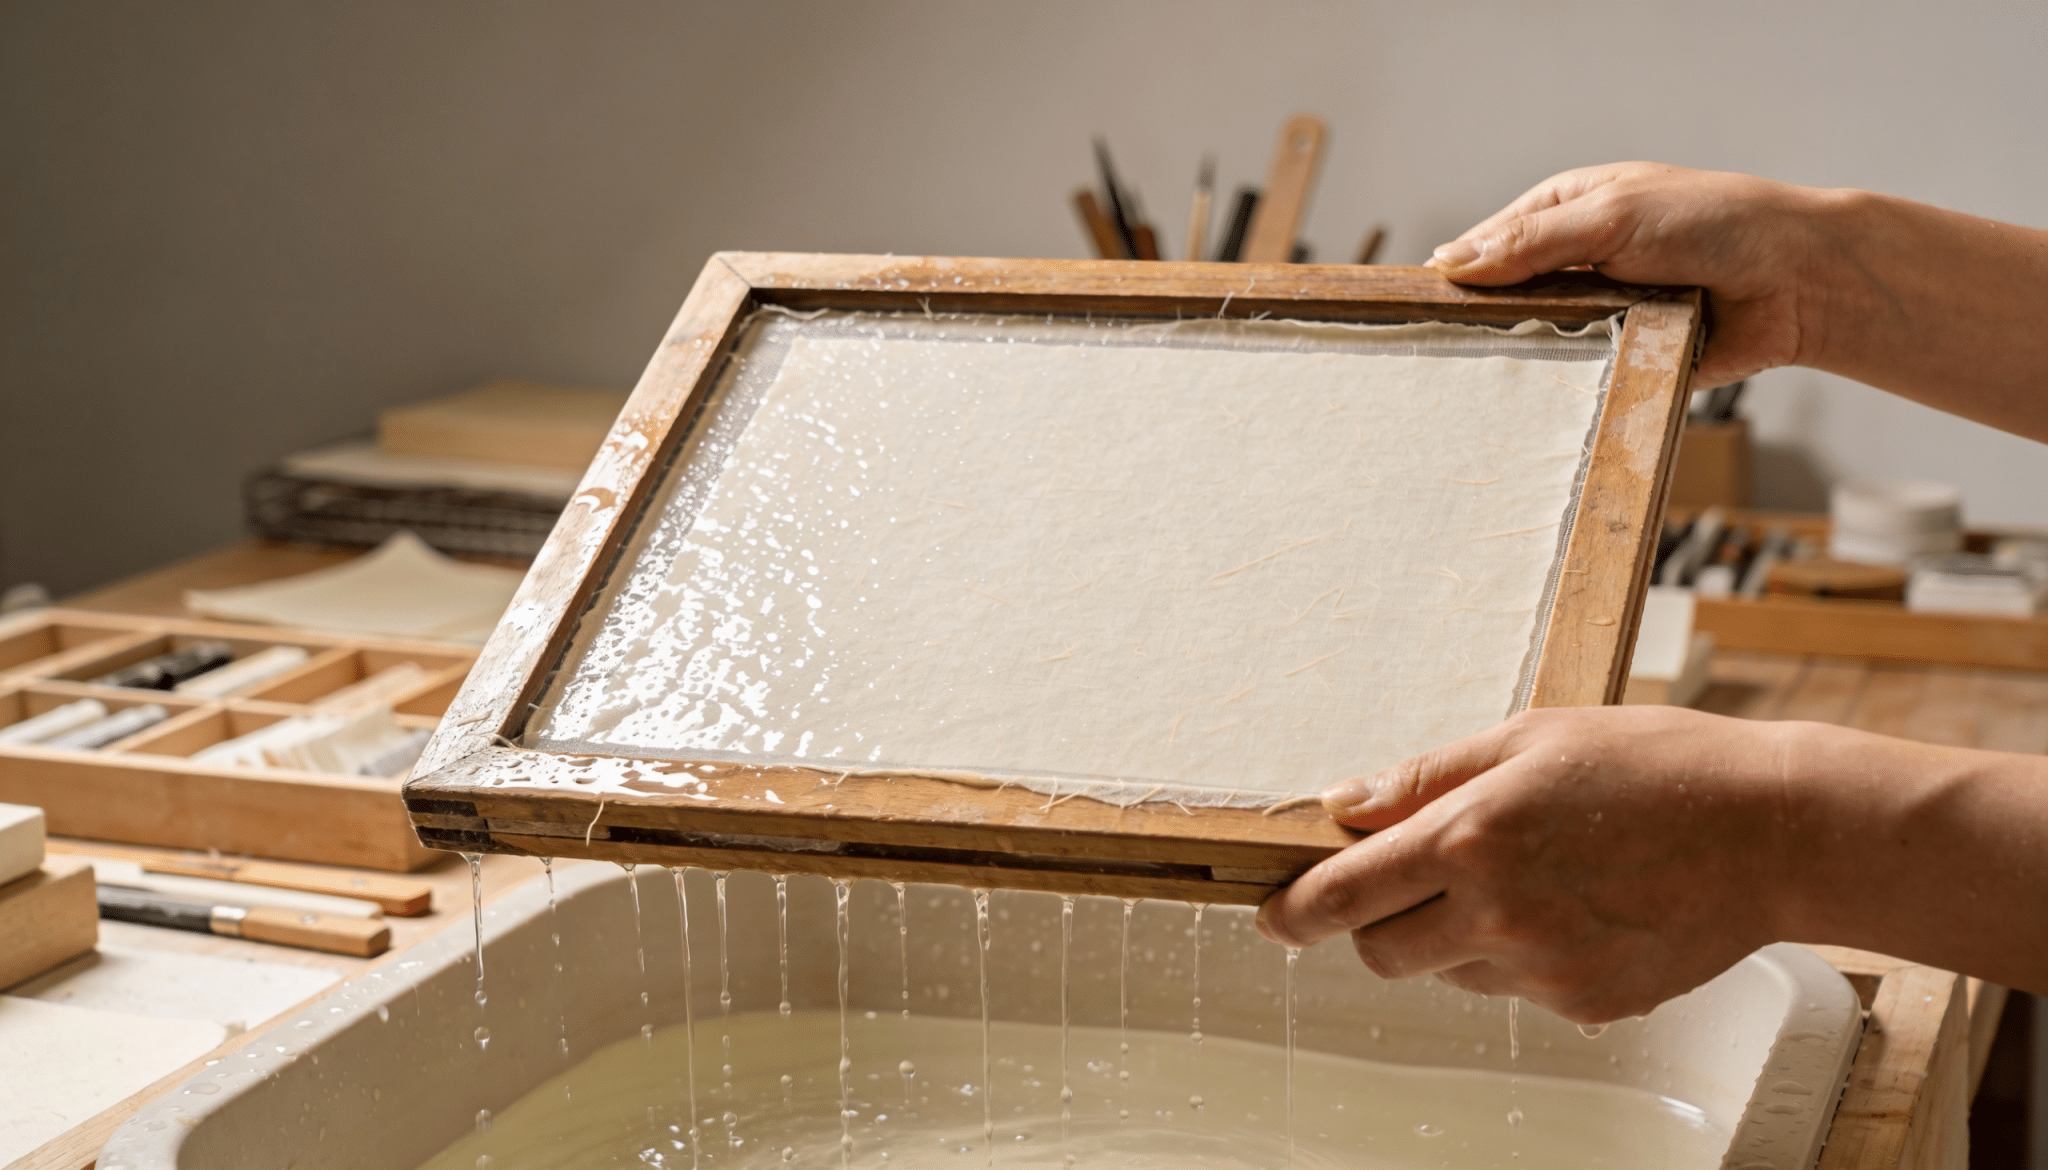
Hold your mold and deckle together (screen side up) and dip it vertically into the pulp mixture. Slide it to the bottom, then lift straight up while keeping it level.
Shake gently side to side to distribute the pulp evenly and drain excess water.
Step 5: Couch the Paper
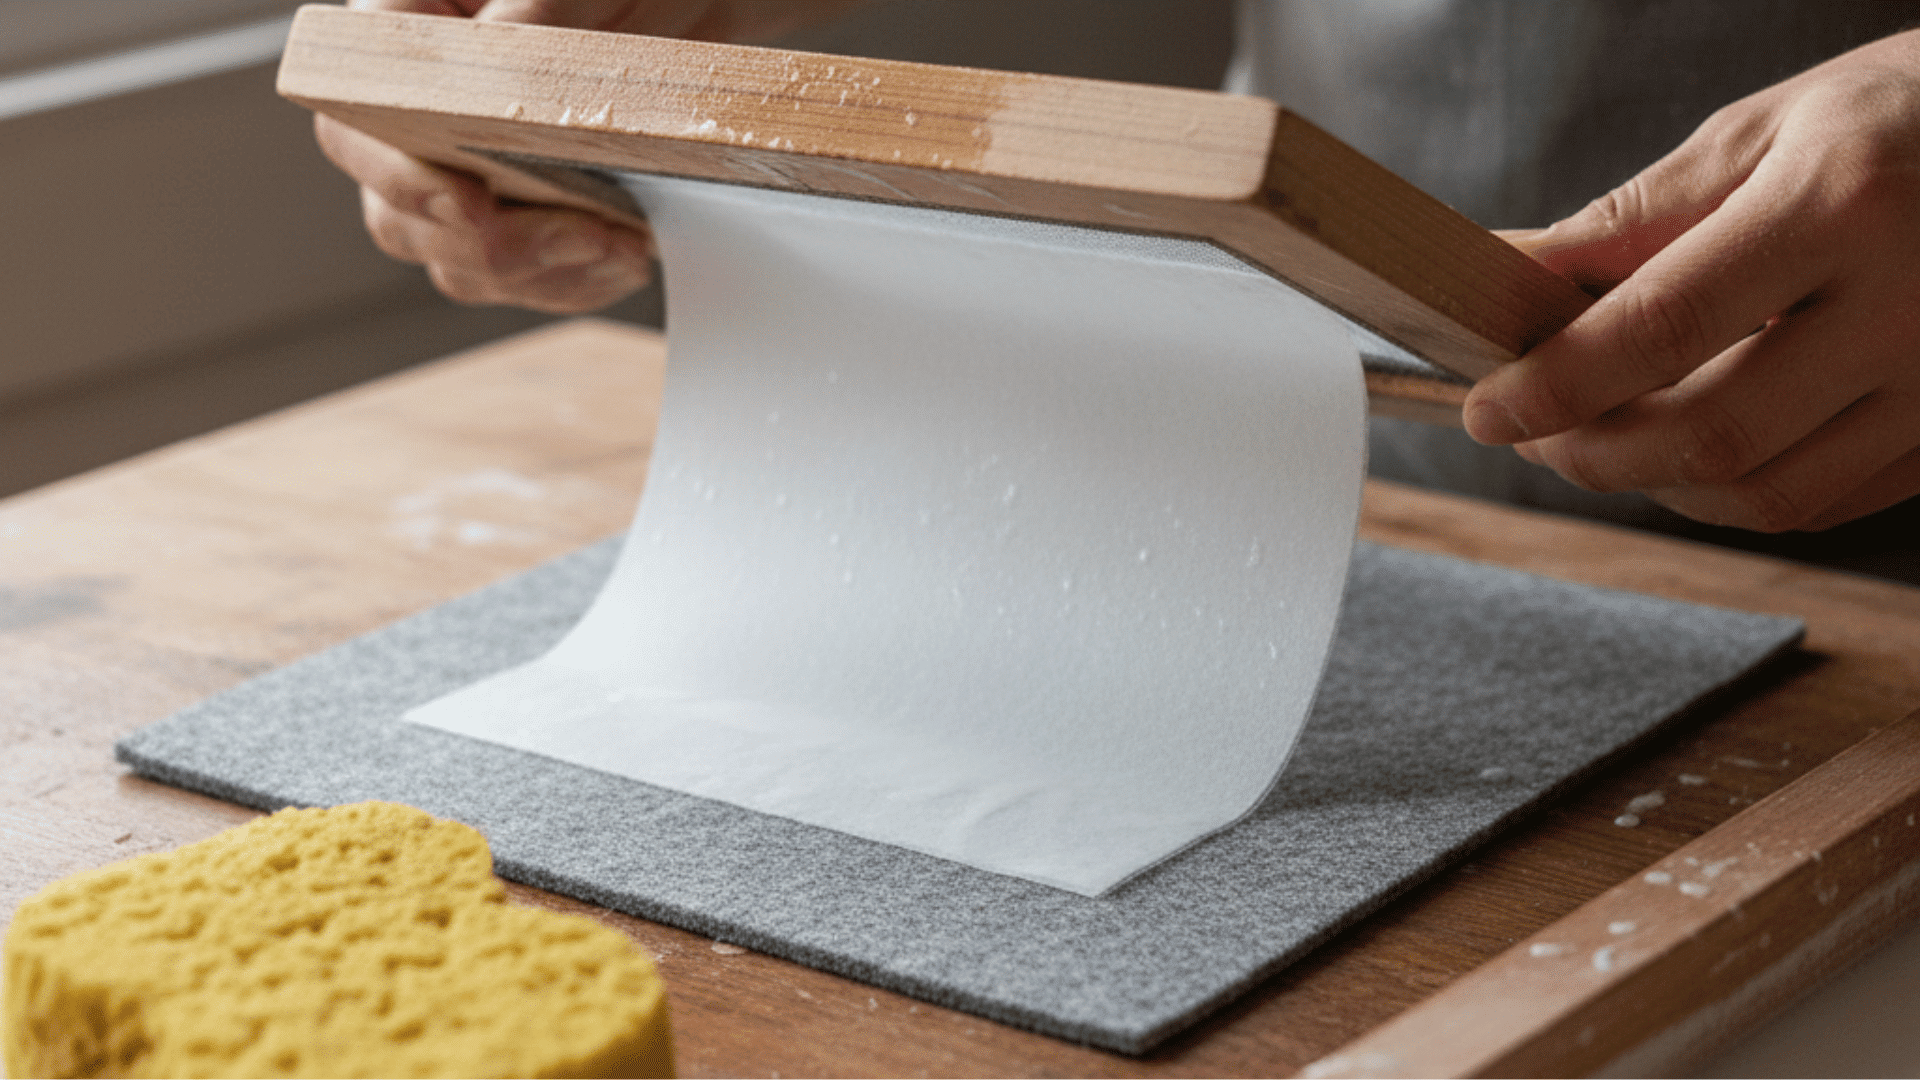
Remove the deckle (top frame). Flip the mold screen-side down onto a damp towel or felt.
Press firmly with a sponge to transfer the paper and absorb water. Carefully lift the mold away, leaving your paper sheet on the fabric.
Step 6: Press and Dry
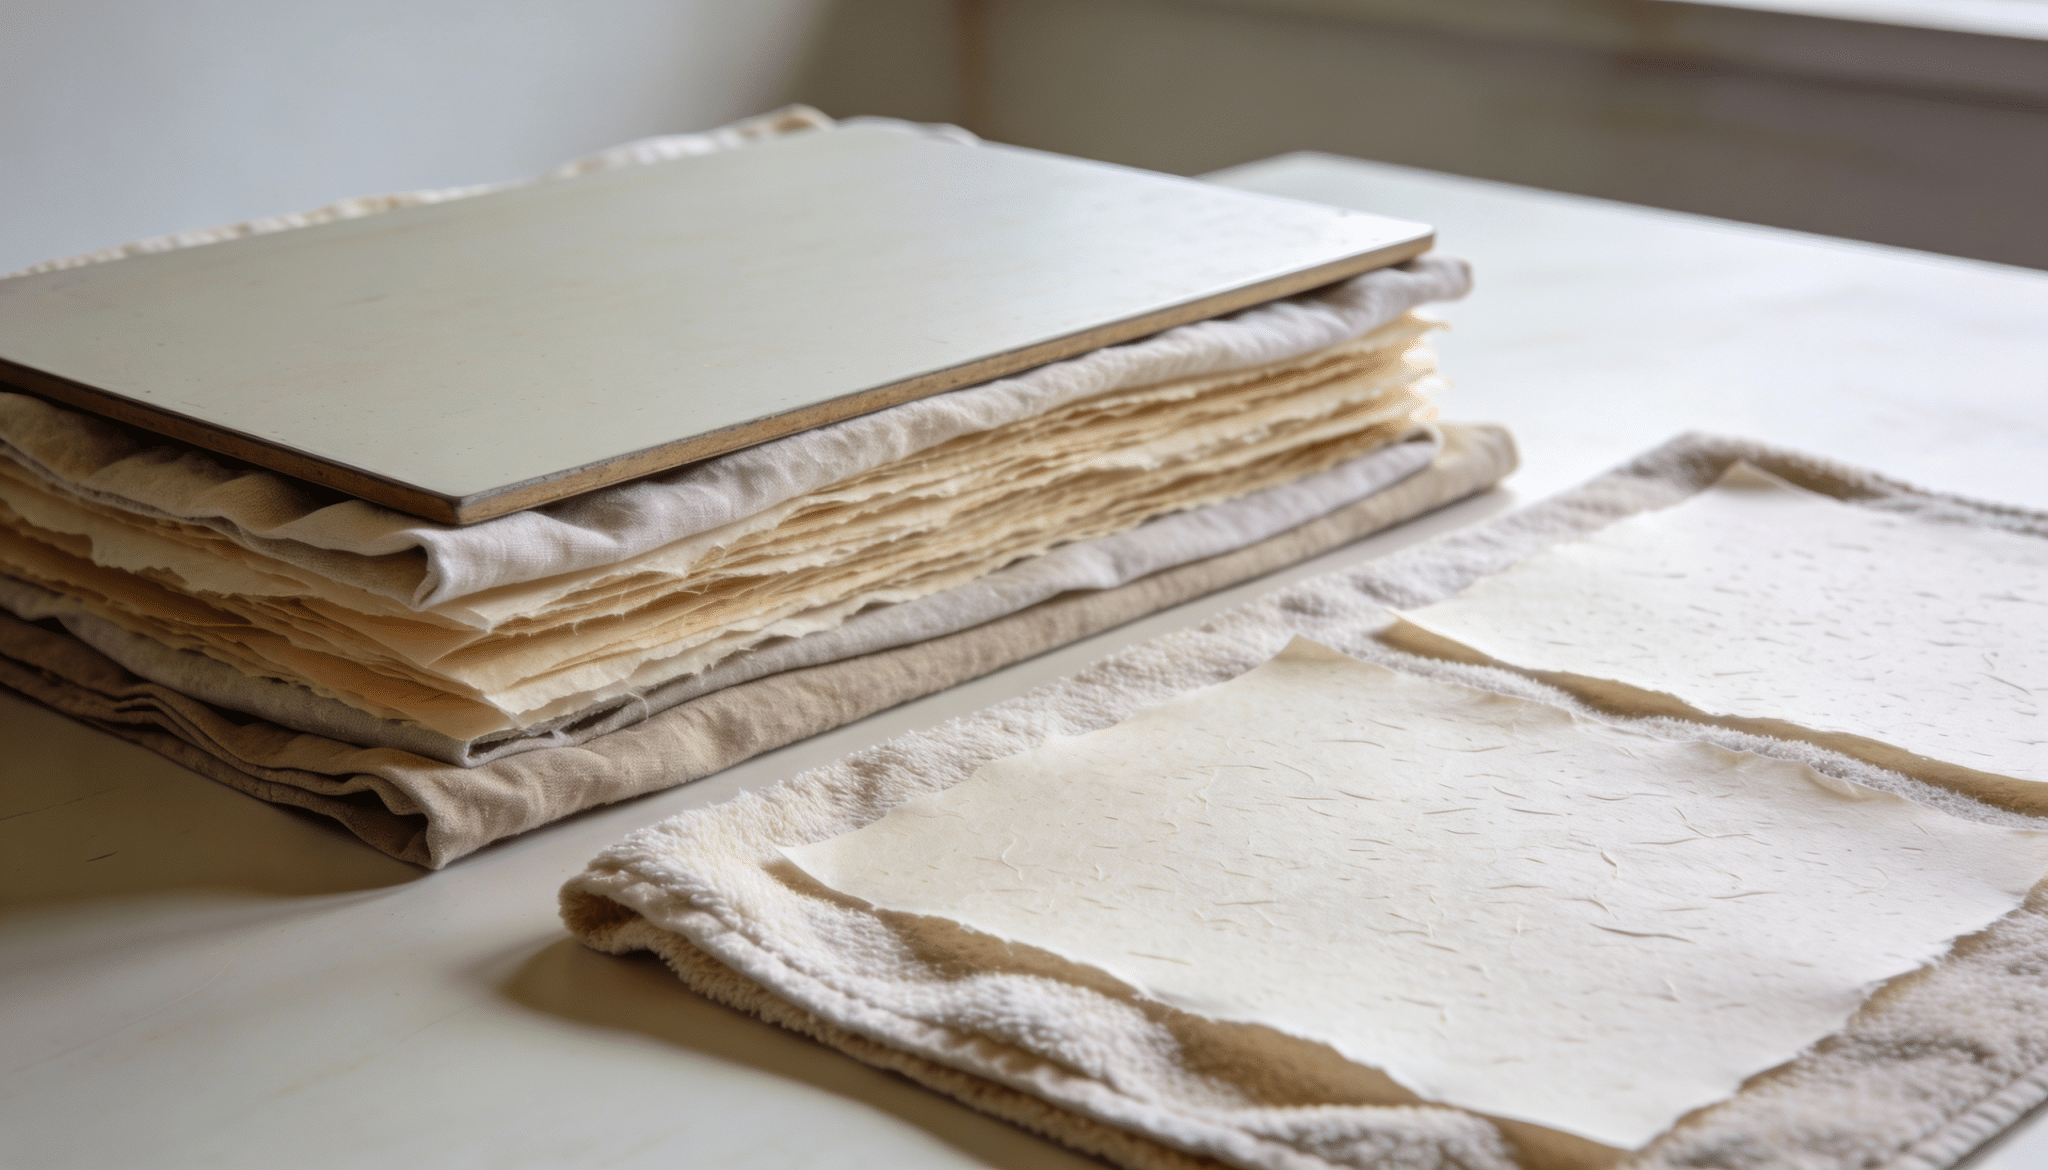
Place another damp cloth over your paper sheet. Repeat the process to stack multiple sheets with fabric between each one.
Press the stack with a flat board to remove more water. Carefully separate and lay sheets flat to air dry, or hang them with clips.
Drying takes 24-48 hours.
Common DIY Paper Mistakes (And How to Fix Them)
Even experienced papermakers hit snags. Here are the most common problems and quick fixes.
1. Uneven thickness with thick and thin spots.
Fix: Add more water to your vat and shake the mold side-to-side after lifting to distribute fibers evenly.
2. Paper won’t release or tear when removed.
Fix: Press harder with your sponge to remove excess water. Make sure your receiving fabric is slightly damp, not bone dry.
3. Sheets are fragile and fall apart easily.
Fix: Add more pulp to your mixture and blend longer for better fiber distribution.
4. Paper curls or warps as it dries.
Fix: Press sheets harder between fabric layers. Place heavy books on top for 10-15 minutes, then dry completely flat.
5. Unblended bits show in finished sheets.
Fix: Blend for 45-60 seconds minimum. Tear paper into smaller pieces and use warm water.
6. Paper develops odor or mold spots.
Fix: Dry in a well-ventilated area or use a fan. Never store sheets until completely dry.
7. Mixed colors turn brown or gray.
Fix: Use one color family per batch. For variety, add colored pulp chunks to white pulp instead of blending colors together.
With practice, these issues become easy to avoid and your papermaking improves with every batch.
Creative DIY Paper Variations
Once you’ve mastered basic papermaking, it’s time to experiment. Here are creative ways to customize your handmade paper.
Flower Petal Paper
Add dried flower petals, leaves, or herbs directly to your pulp mixture. Rose petals, lavender, and pressed flowers create beautiful, decorative sheets perfect for special occasion cards or framed art.
Best for: Wedding invitations, thank-you cards, botanical art
Seed Paper
Mix wildflower or herb seeds into your pulp before forming sheets. Recipients can plant your cards or gift tags directly in soil, and flowers will grow. It’s a gift that keeps giving.
Best for: Eco-friendly gifts, event favors, gardening tags
Colorful Paper
Add food coloring or liquid watercolors to your pulp for vibrant hues. Start with a few drops and adjust until you get your desired shade. You can also blend different colored paper scraps for natural tones.
Best for: Art projects, colorful stationery, children’s crafts
Textured Paper
Incorporate coffee grounds, tea leaves, dryer lint, or small fabric threads for interesting textures. Shredded tissue paper adds softness, while thin yarn pieces create decorative patterns.
Best for: Rustic designs, handmade journals, vintage-style projects
Scented Paper
Mix in essential oils (lavender, eucalyptus, or citrus) or dried herbs like mint or rosemary. The scent lingers as the paper dries, creating aromatic stationery.
Best for: Personal letters, drawer liners, gift wrapping
Glitter and Confetti Paper
Sprinkle biodegradable glitter, small confetti pieces, or metallic threads onto wet sheets before pressing. Perfect for festive cards and gift wrap.
Best for: Party invitations, celebration cards, holiday crafts
Layered Paper
Create two-toned sheets by forming a base layer, then adding a thin layer of different-colored pulp on top before pressing. This creates dimension and visual interest.
Best for: Artistic projects, unique backgrounds, sophisticated stationery
Embedded Objects
Press thin items like ribbon scraps, tiny pressed flowers, or decorative threads between two thin paper layers for a laminated effect.
Best for: Special keepsakes, memory books, decorative art pieces
The possibilities are infinite; experiment with whatever materials inspire you to create truly one-of-a-kind paper.
Final Tips for Better Handmade Paper
Master these essential tips to create beautiful handmade paper consistently.
Technique Basics
- Start simple before adding colors or textures
- Stir your vat between sheets; fibers settle quickly
- Use warm water for smoother, faster blending
- Press thoroughly to remove maximum water
Drying and Storage
- Dry completely for 24-48 hours before storing
- Use a fan in humid conditions to prevent mold
- Keep sheets flat during drying to avoid warping
Smart Habits
- Label experiments to recreate successful batches
- Clean tools immediately; dried pulp is tough to remove
- Save mistakes by re-blending failed sheets
- Replace worn screens before they tear
Your first batches won’t be perfect, and that’s okay. Each attempt improves your technique. With practice, you’ll create professional-quality paper every time.
Conclusion
Making your own paper is easier than you think and surprisingly fun.
With just a blender, simple frames, and scrap paper, you can create beautiful custom sheets in under an hour. Add flower petals, seeds, or colors for truly unique results.
This blog covers materials, step-by-step instructions, creative variations, and expert tips.
Ready to turn trash into treasure? Let’s get started.