
No products in the cart.
DIY / Upcycle
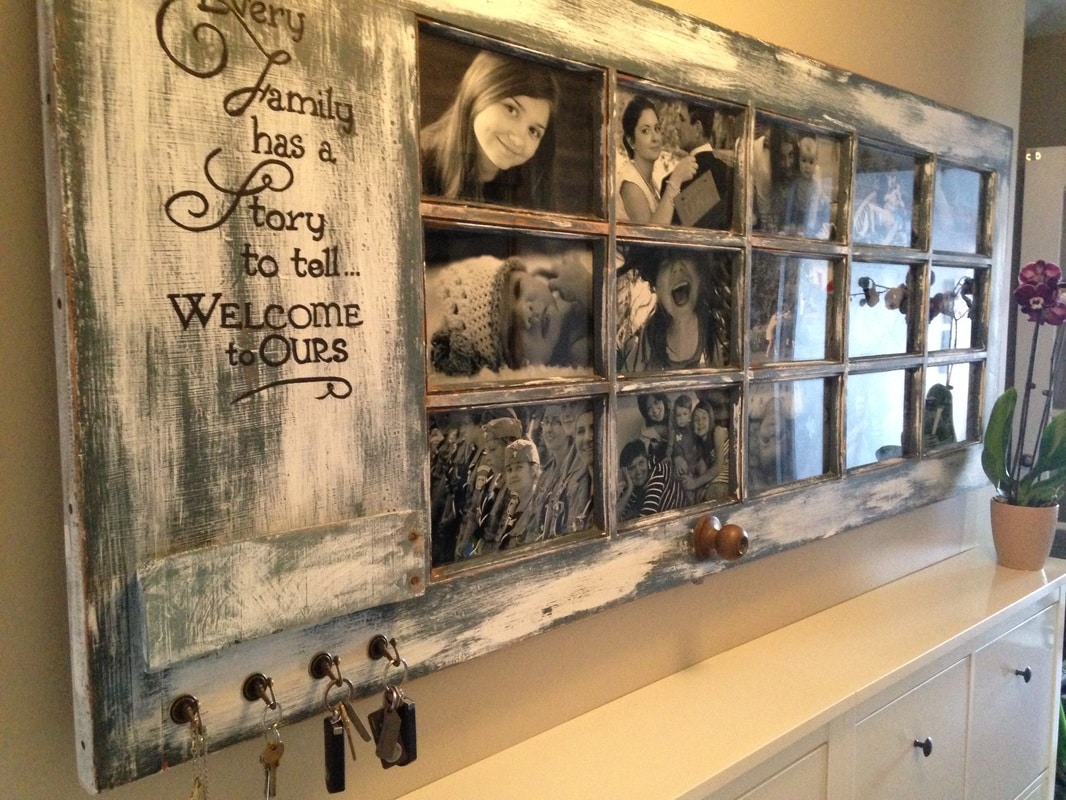
How To Turn An Old Door Into Stunning Picture Frame
Pinterest is a dangerous place. Once you see some DIY project you love, it gets stuck in your brain and at some time you must end up doing it.
This happened to me, let’s say a couple of times. This time it was the door that was turned into a picture frame.
This happened to me, let’s say a couple of times. This time it was the door that was turned into a picture frame.
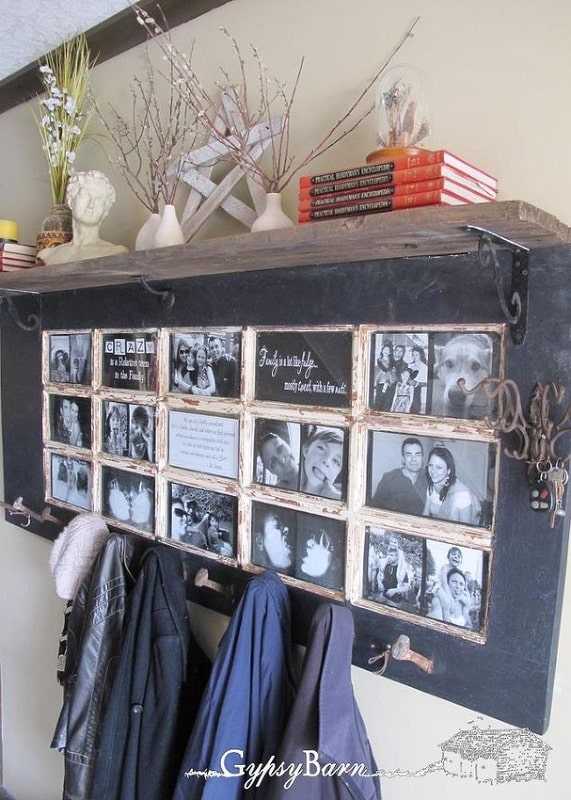
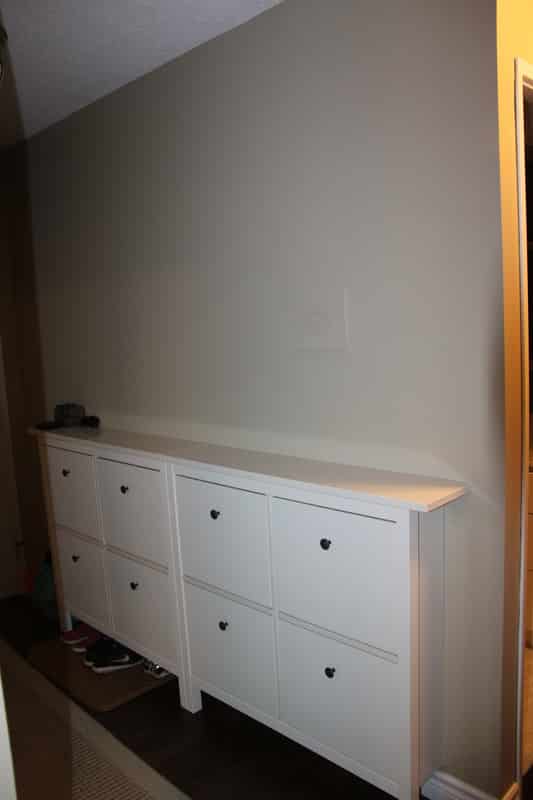
It was a perfect idea for my hallway. I was still missing some art for the wall above my shoe rack. And I thought it would be a perfect solution.
Step 1:
You need to have a big enough space to hang the door.
So, find an open wall that will fit a frame measuring approximately 32 x 80 inches.
Step 2:
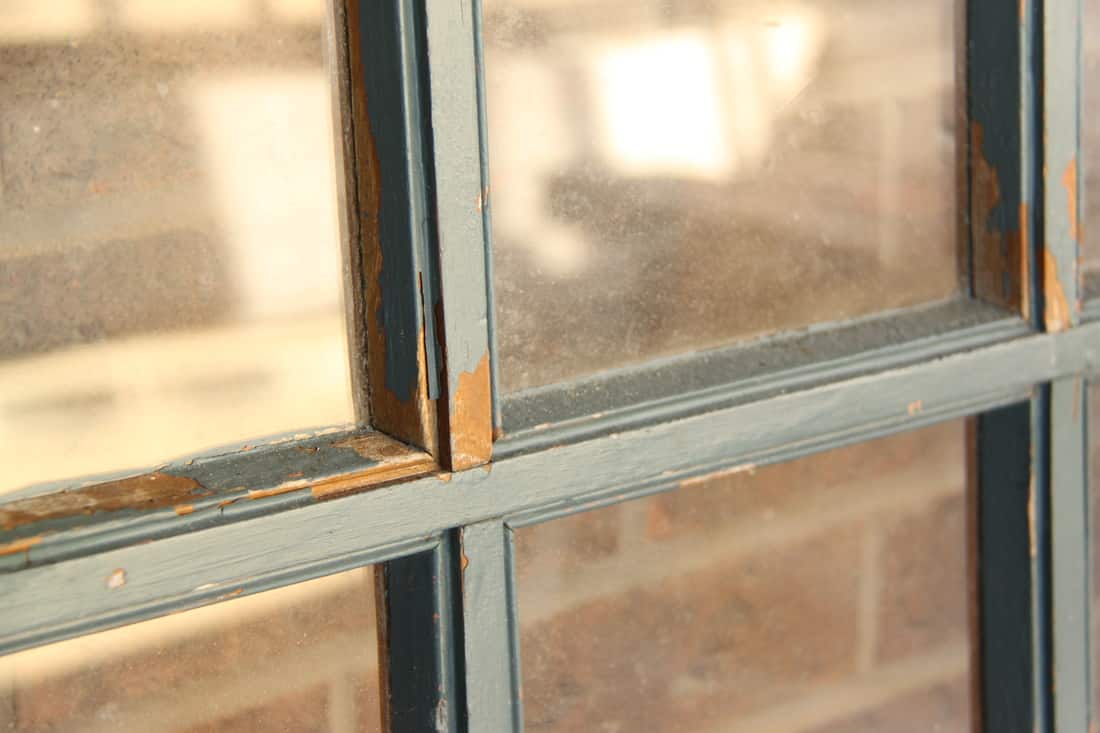
Finding the door can be a little tricky. It took me a couple of weeks of Kijiji and Craigslist browsing.
For this french door, I paid $40.

The door doesn’t have to be in perfect shape, the most important is to make sure that the glass panels are whole.
Step 3:
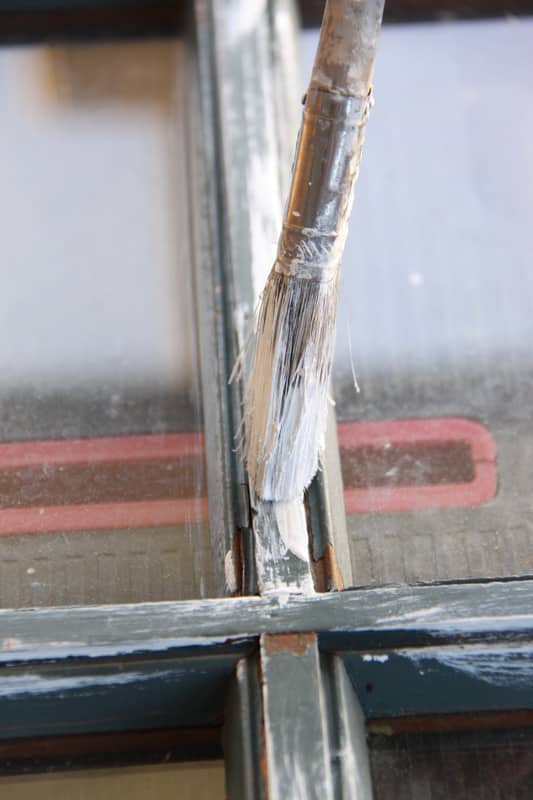
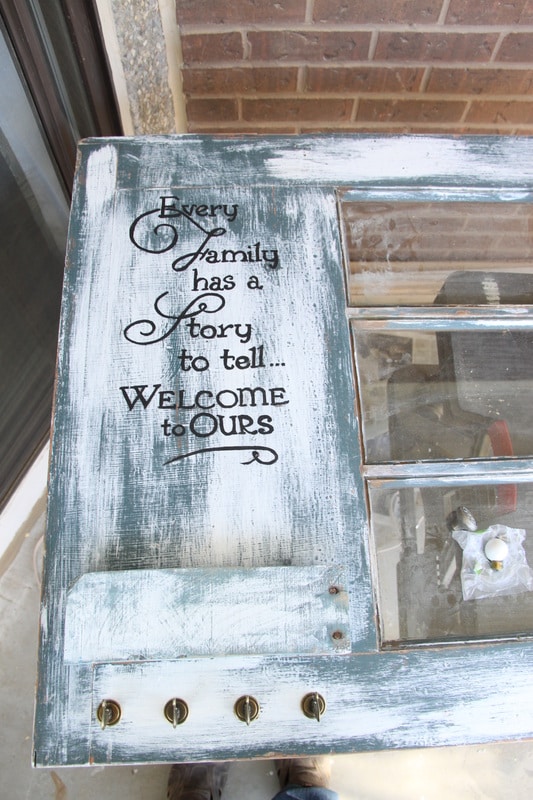
The door I found had a dark green/turquoise color perfectly working with my home décor. So, the first thing we put some white paint on the door but not fully covering the original color. This way you are giving the door this old rustic look without making it all modern and white.
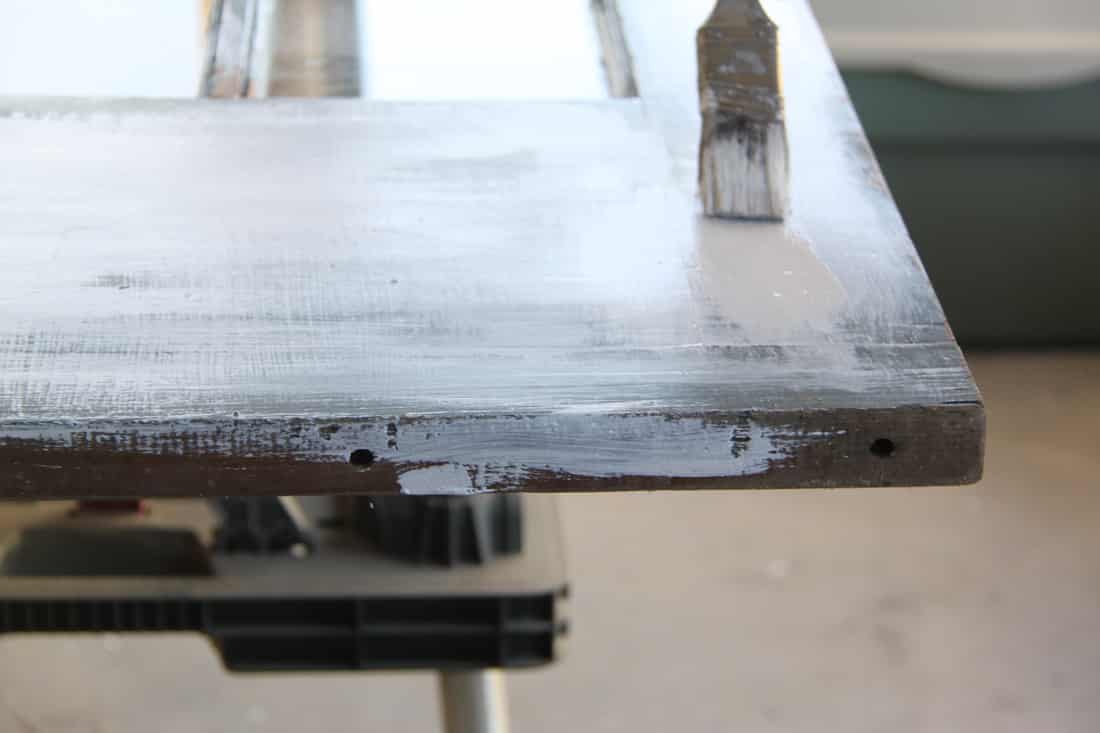
I repeated the strokes horizontally and vertically, just lightly pulling the paint over the door.
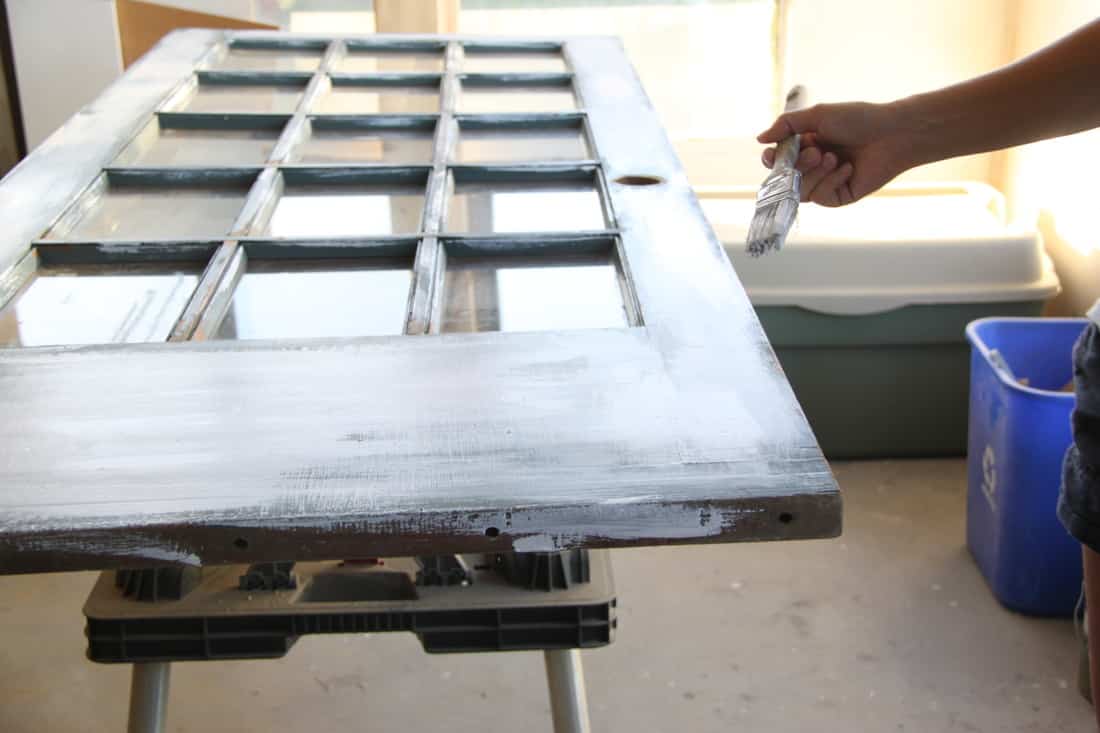
And remember that your brush strokes don’t have to be perfect, and you don’t have to cover the whole door with paint.
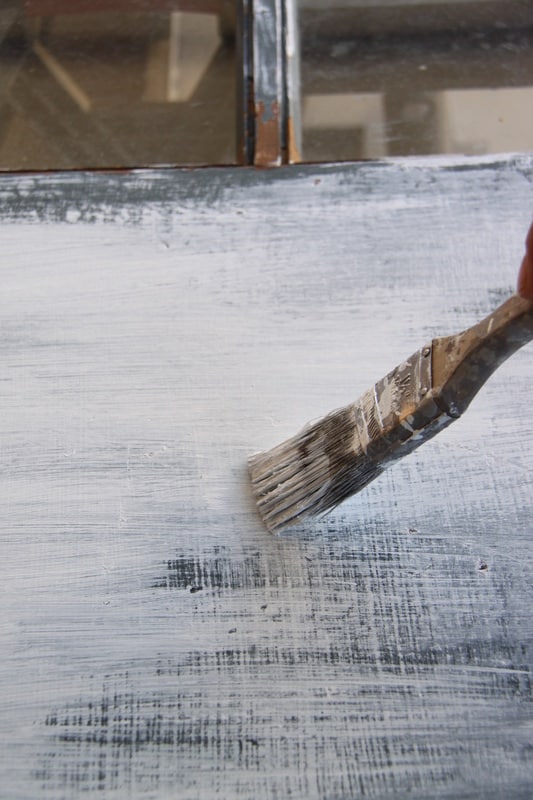
After the paint was all dry, I used some sandpaper to give it a rusty but smooth look.
Step 4:
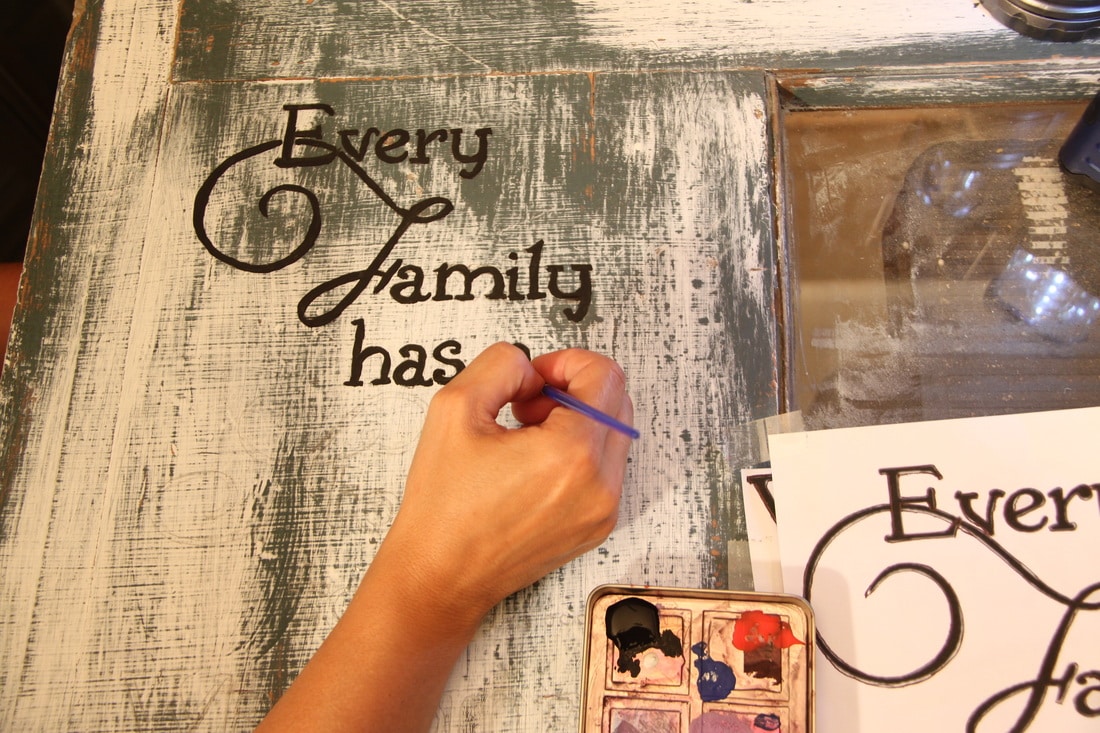
Choose the quote you want to use on your door. If you like the one that I used – you can download it here.

Print it on a piece of paper and trace it STRONGLY with a pencil on the door.
Step 6:
Choose accessories you might want to add to the frame.
Me because it was in the entrance hall I knew I needed hooks for keys, a place for phones, wallets, etc.
So, I found driftwood in the park. we have attached the driftwood to make a little pocket and 4 hooks to hang keys etc.
Me because it was in the entrance hall I knew I needed hooks for keys, a place for phones, wallets, etc.
So, I found driftwood in the park. we have attached the driftwood to make a little pocket and 4 hooks to hang keys etc.


Attach all your accessories to the doors.
Step 7:
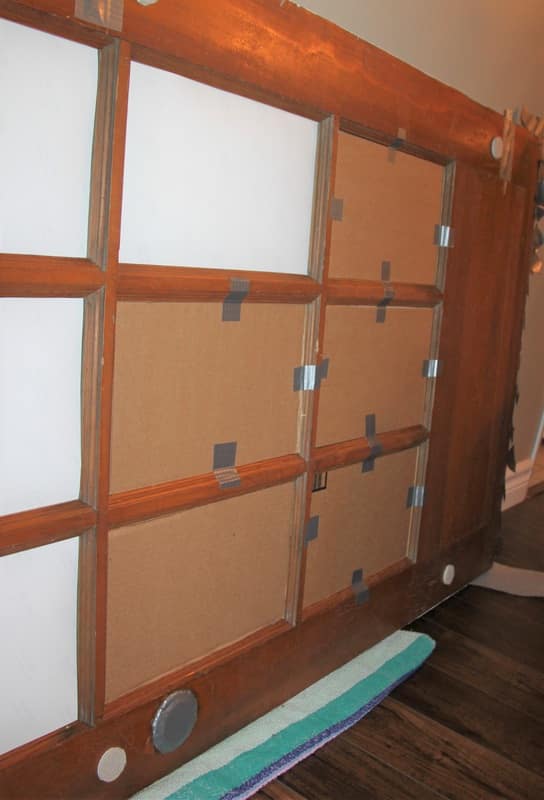
Clean the glass windows
Step 8:
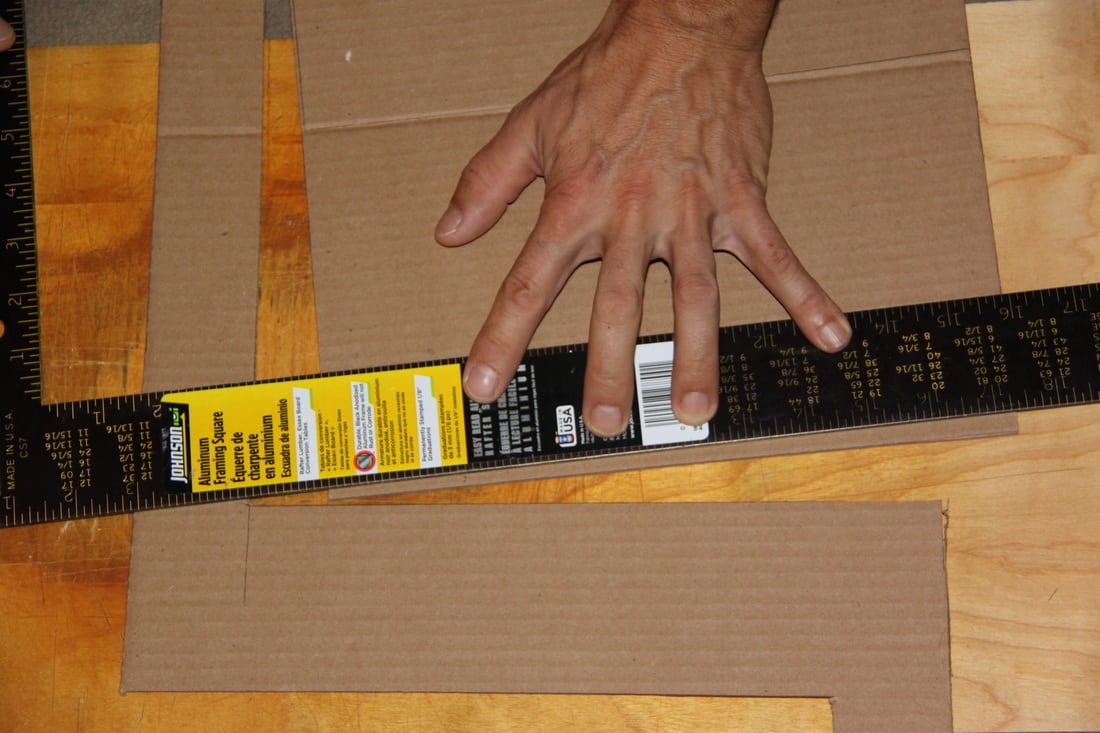
Cut out the exact size and number of cardboard pieces to cover every window.
Step 9:
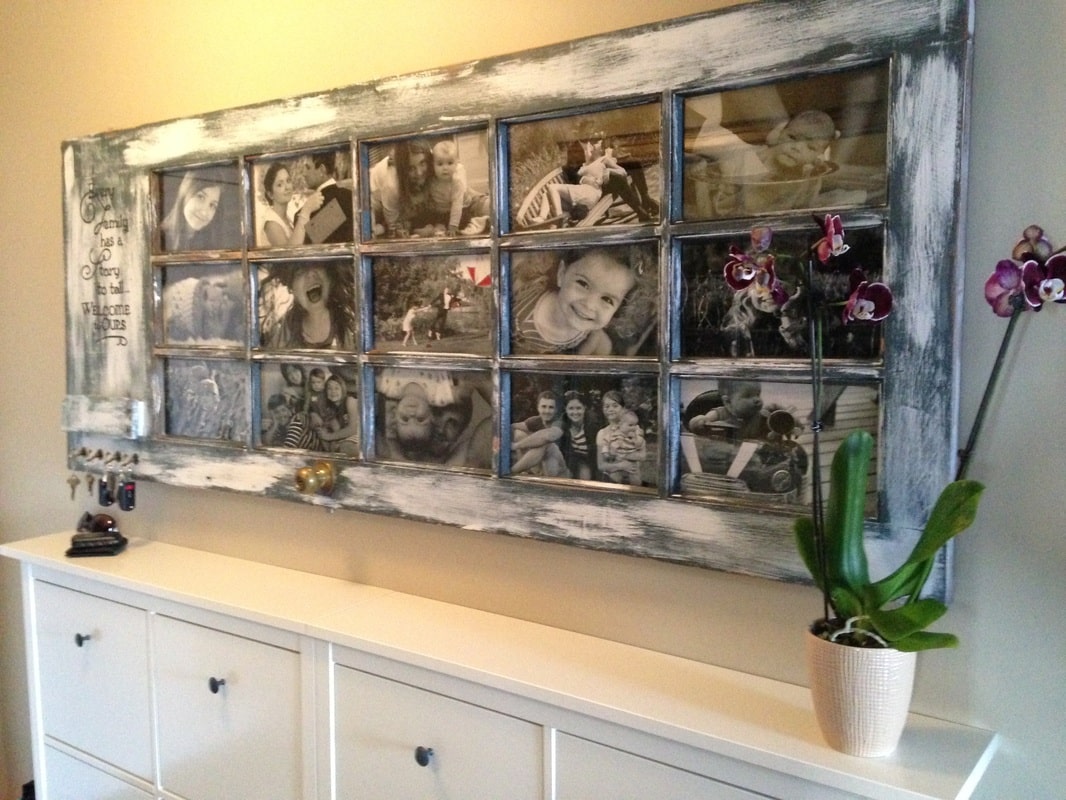
Choose the best family pictures that you would like to display and share with all your guests.
Place the pictures inside the frames and tape the cardboard pieces at the back of them to keep them in one spot.
Place the pictures inside the frames and tape the cardboard pieces at the back of them to keep them in one spot.
Step 10:
Hang your fab and adorable door frame on the wall & Enjoy it every time you walk by it.

This is really very amazing & creative idea.
Thank you so much!